PartKeepr 1.4.0 installation on a Raspberry Pi
This guide will take you through the process of installing PartKeepr 1.4.0 on a Raspberry Pi to run your own parts inventory management system.
We’re assuming familiarity with basic Linux concepts, such as entering commands into a terminal, SSH, etc. We won’t be covering those concepts here.
Disclaimer: This step-by-step example is provided merely for informational purposes, in the hopes of helping others to get going with PartKeepr. If you follow the steps described here, you do so entirely at your own risk. Be especially mindful that if your system will be exposed to the Internet or any untrusted network, you must consult with a security expert before deploying PartKeepr or any other technology.
Contents
[hide]Fresh Raspberry Pi
Note: We are using an older version of Raspbian (stretch instead of the newer buster) to get a working version of PHP 7.0 with ACPu cache. The newer PHP 7.3 ACPu cache used by buster wasn’t compatible with PartKeepr during our testing (it is believed this compatibility issue is due to a Symfony2 framework limitation).
Step-by-step
Download a Raspbian stretch Lite SD card image: We used the last stretch release: 2019-04-08-raspbian-stretch-lite.zip (354MB) from the Raspbian Lite Archives 2019-04-09.
Prepare a new SD card with the downloaded image: We used the Raspberry Pi Imager utility.
Power on a Raspberry Pi with the new SD card inserted and a HDMI display and keyboard attached (only required for first boot). We are using a Raspberry Pi 3 which has provided good performance to date. From the terminal, run:
sudo raspi-config
Using the menu, we set the following:
- (Optional) Set the hostname to “PartKeepr”,
- Changed default user password,
- Enabled the SSH server.
(Optional) Set the IP address to be static as follows:
sudo nano /etc/dhcpcd.conf
See the bottom of this config file for example static IP configurations, and use as required.
Shutdown the Raspberry Pi with the following command:
sudo shutdown -h 0
We then unplugged the display and keyboard, moved the Raspberry Pi to it’s location (server cabinet), and connected an Ethernet cable for network access.
Power on the Raspberry Pi and access via SSH. The following of this guide assumes access to the device via SSH and later a web browser.
Update with the following commands:
sudo apt-get update
sudo apt-get upgrade
Installing PartKeepr 1.4.0
The following is heavily derived from the PartKeepr on Debian "Jessie" instructions.
Install prerequisites
Install the apache web server:
sudo apt-get install apache2 apache2-doc
Install curl and ntp:
sudo apt-get install curl ntp
Install the mariadb database server and client:
sudo apt-get install mariadb-server-10.0 mariadb-client-10.0
Note: By default the mariadb server is installed with no root password. Use the following command to run the security wizard. Set a root password and answer yes (default) to other questions if unsure:
sudo mysql_secure_installation
Install PHP 7.0 and extensions
sudo apt-get install php7.0 php-apcu php-apcu-bc php7.0-bcmath php7.0-curl php7.0-gd php7.0-intl php7.0-ldap php7.0-mysql php7.0-xml
Verify apache is working
In a web browser go to the Raspberry Pi’s IP address and confirm that the default Apache “It works!” page is displayed.
Download PartKeepr 1.4.0
From the home directory, run:
wget https://downloads.partkeepr.org/partkeepr-1.4.0.zip
Unzip with this command:
unzip partkeepr-1.4.0.zip
Move to the www directory:
sudo mv -R partkeepr-1.4.0 /var/www/partkeepr
Modify PartKeepr directory and file permissions
PartKeepr needs the ability to write into certain directories and files within its installation.
We opted to set our PartKeepr installation's ownership and permissions so that its files and directories are owned by our "admin" user and the "www-data" group. We set the files readable and writable by the owner and group, but inaccessible to everyone else. It is necessary to give the www-data group write access to the files because PartKeepr requires the ability to modify its files.
The "www-data" group already exists in the Debian system. If you are using a different operating system, you may need to check which group owns the web data files and make the appropriate adjustments in the commands below.
We configured ownership and permissions as follows:
sudo chown -R pi:www-data /var/www/partkeepr
sudo find /var/www/partkeepr -type d -exec chmod 770 {} +
sudo find /var/www/partkeepr -type f -exec chmod 660 {} +
Configure Apache
Enable the Apache modules userdir and rewrite:
sudo a2enmod userdir rewrite
Modify Apache settings:
sudo nano /etc/apache2/apache2.conf
Add these lines:
<Directory /var/www/partkeepr/>
AllowOverride All
</Directory>
Exit nano with ctrl+x and save the file.
Modify Apache web root:
sudo nano /etc/apache2/sites-available/000-default.conf
Comment the line DocumentRoot /var/www/html by placing a # in front of it and add a similar line which points to /var/www/partkeepr/web.
# DocumentRoot /var/www/html
DocumentRoot /var/www/partkeepr/web
Exit nano with ctrl+x and save the file.
Make the same change to /etc/apache2/sites-available/default-ssl.conf:
sudo nano /etc/apache2/sites-available/default-ssl.conf
# DocumentRoot /var/www/html
DocumentRoot /var/www/partkeepr/web
Exit nano with ctrl+x and save the file.
Configure PHP
Modify PHP configuration:
sudo nano /etc/php/7.0/apache2/php.ini
Note: In nano you can find/search for text using ctrl+w (Where Is), which may be useful for the following:
Locate the line:
max_execution_time = 30
change to:
max_execution_time = 150
Locate the line:
upload_max_filesize = 2M
change to:
upload_max_filesize = 8M
Locate the line:
;date.timezone =
Uncomment it by removing the initial semicolon and add an appropriate time zone:
date.timezone = Australia/Brisbane
In our case, we used Australia/Brisbane. You can look up the possible time zone settings in the PHP manual here: [1]
Exit nano with ctrl+x and save the file.
APC Metadata Caching
Instructions adapted from the APC Metadata Caching page.
Symfony, per default, uses a deeply nested filesystem structure. This might be a problem on systems with slow I/O, like a Raspberry Pi. You can configure PartKeepr to use APC as metadata cache, greatly decreasing the required I/O performance.
The PHP APC Modules were installed in a previous step. We now need to make the following changes:
sudo nano /var/www/partkeepr/app/config/config_framework.yml
Note that the indentation is mandatory
Add the following snippet to the top of the file:
services:
    app.doctrine.apc_cache:
       class: Doctrine\Common\Cache\ApcCache
       calls:
           - [setNamespace, [""]]
Below the framework, insert the following lines so that it reads:
framework:
    annotations:
        cache: "app.doctrine.apc_cache"
Reload Apache configuration
Configuration changes made above will not take effect until Apache is instructed to reload its configuration files:
sudo service apache2 restart
PartKeepr setup
Open a web browser and navigate to the PartKeepr setup wizard. I.e. assuming your Raspberry Pi's IP address is 192.168.1.123, you should go to: http://192.168.1.123/setup
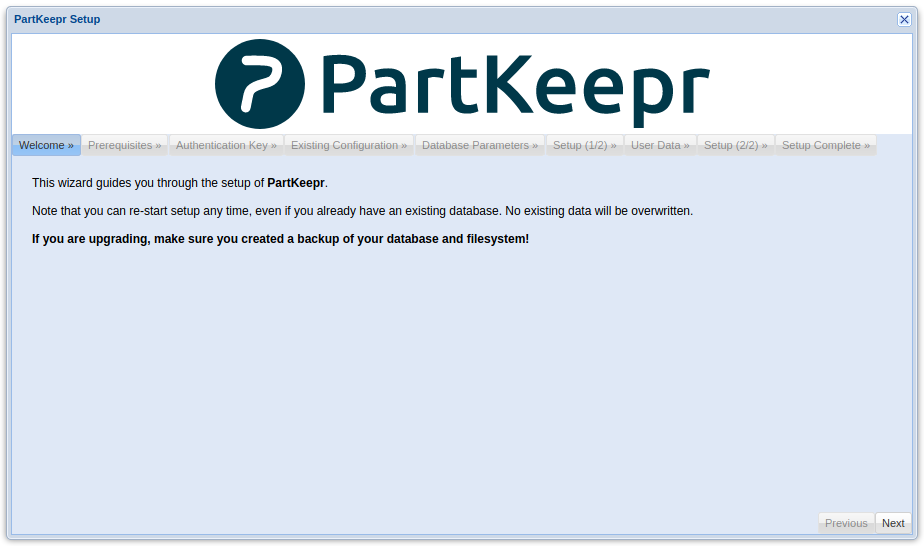
You should then see the setup wizard:
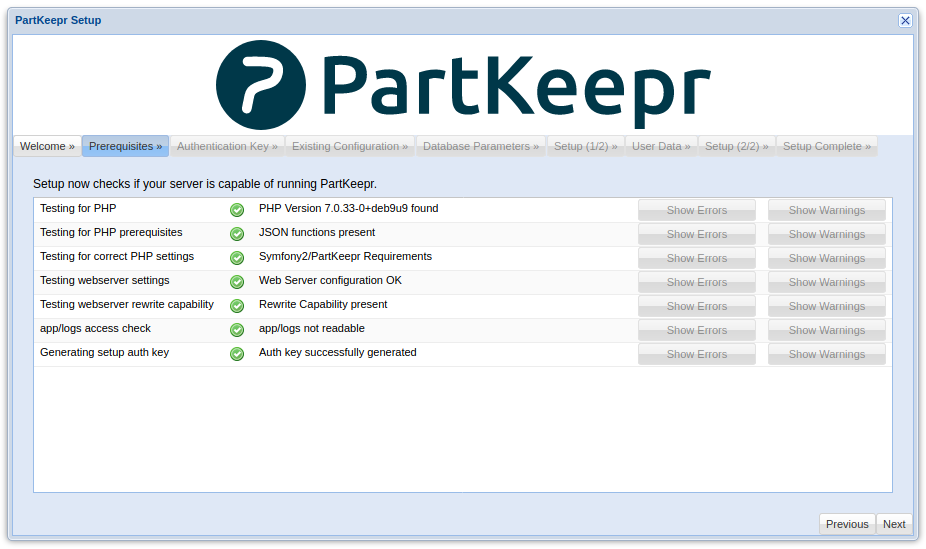
Click Next. The prerequisite check will be displayed:
Click Next, complete the Auth key step:
You can view the autokey with the following command in the terminal:
cat /var/www/partkeepr/app/authkey.php
Copy-Paste the key into the Setup wizard as prompted.
Then click Next (new config), then Next again.
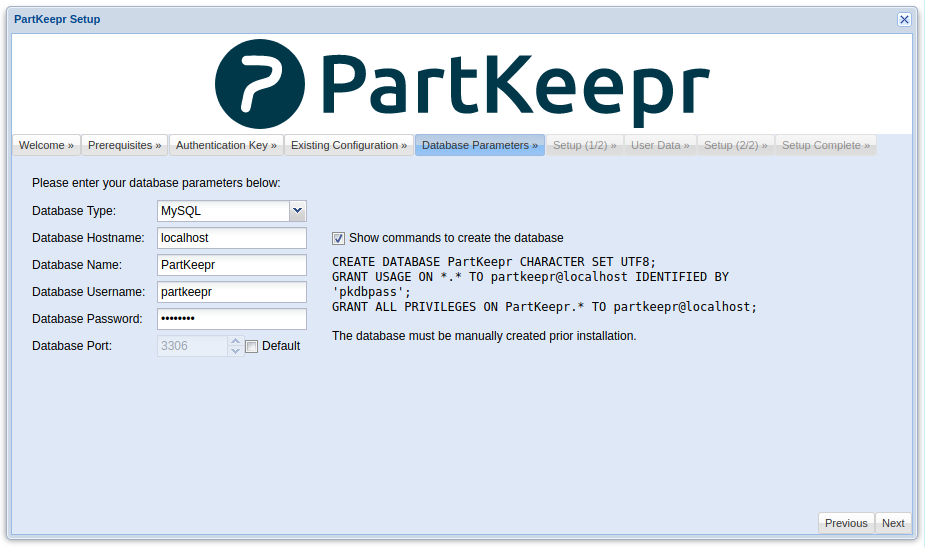
Database parameters setup
Check the box to show the DB commands, and fill in the details for a new database user.
Here’s an example of this process:
$ sudo mysql -u root -p
Enter password:
Welcome to the MariaDB monitor.  Commands end with ; or \g.
Your MariaDB connection id is 44
Server version: 10.0.28-MariaDB-2+b1 Raspbian testing-staging

Copyright (c) 2000, 2016, Oracle, MariaDB Corporation Ab and others.

Type 'help;' or '\h' for help. Type '\c' to clear the current input statement.

MariaDB [(none)]> CREATE DATABASE PartKeepr CHARACTER SET UTF8;
Query OK, 1 row affected (0.00 sec)

MariaDB [(none)]> GRANT USAGE ON *.* TO partkeepr@localhost IDENTIFIED BY 'my-db-password';
Query OK, 0 rows affected (0.01 sec)

MariaDB [(none)]> GRANT ALL PRIVILEGES ON PartKeepr.* TO partkeepr@localhost;
Query OK, 0 rows affected (0.01 sec)

MariaDB [(none)]> SHOW DATABASES;
+--------------------+
| Database           |
+--------------------+
| PartKeepr          |
| information_schema |
| mysql              |
| performance_schema |
+--------------------+
4 rows in set (0.01 sec)

MariaDB [(none)]> SELECT User FROM mysql.user;
+-----------+
| User      |
+-----------+
| partkeepr |
| root      |
+-----------+
2 rows in set (0.00 sec)

MariaDB [(none)]> quit
Bye
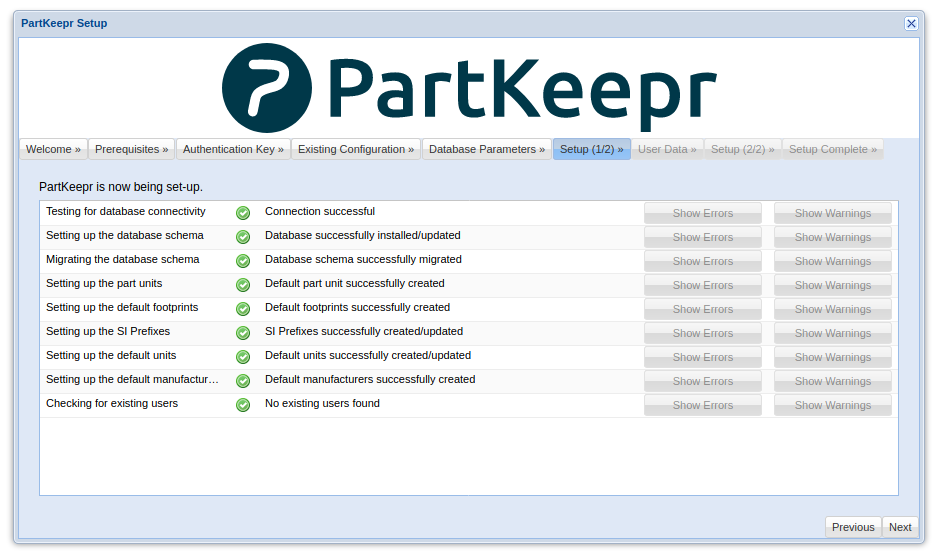
Click Next to go to Setup (1/2) - This will build the database:
Click Next.
Admin user setup
Eneter the details for the admin user. Here's an example:
- User: pk-admin
- Password: a-strong-password
- Email: your@email.address.com
- Authentication Method: HTTP Basic - Note: the alternative 'WSSE' method is problematic - See KB00006:Authentication Provider.
Click Next to go to Setup (2/2) - This will complete setup - Note the warming up the cache takes a little while and relies on the APCu steps mentioned earlier.
Click Next.
Cronjob setup
At this point, PartKeepr will ask you to set up a cronjob. Cron is a program that schedules tasks to run at given intervals. Please note that under Debian, cron jobs are configured a bit differently than other systems. Rather than add a line to /etc/crontab, we add a file in /etc/cron.d as follows...
In the terminal:
sudo nano /etc/cron.d/partkeepr
Type the following contents, being particularly careful to copy the spaces and commas exactly. (Spaces separate between fields, whereas commas allow placing multiple items into a single field -- but only if there are no spaces after those commas!)
0 0,6,12,18 * * * pi /usr/bin/php /var/www/partkeepr/app/console partkeepr:cron:run
The cron job can be tested like this:
/usr/bin/php /var/www/partkeepr/app/console partkeepr:cron:run --verbose
No errors or warnings should appear.
Back in the web browser, click Submit and setup will be completed!
First login
In your web browser, navigate to your Raspberry Pi's IP address.
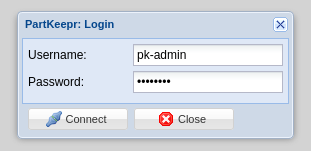
You can then login with the admin user created during setup:
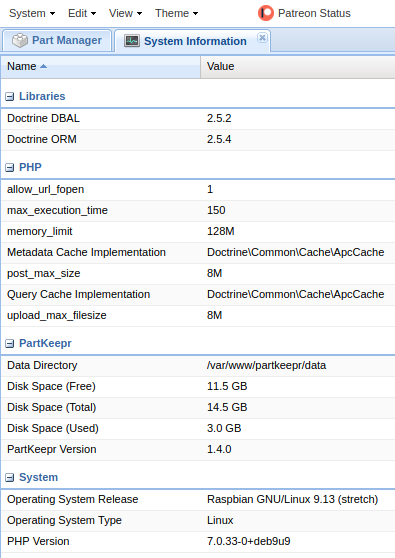
Here's what the System Information page looks like on the Raspberry Pi 3 following these steps:
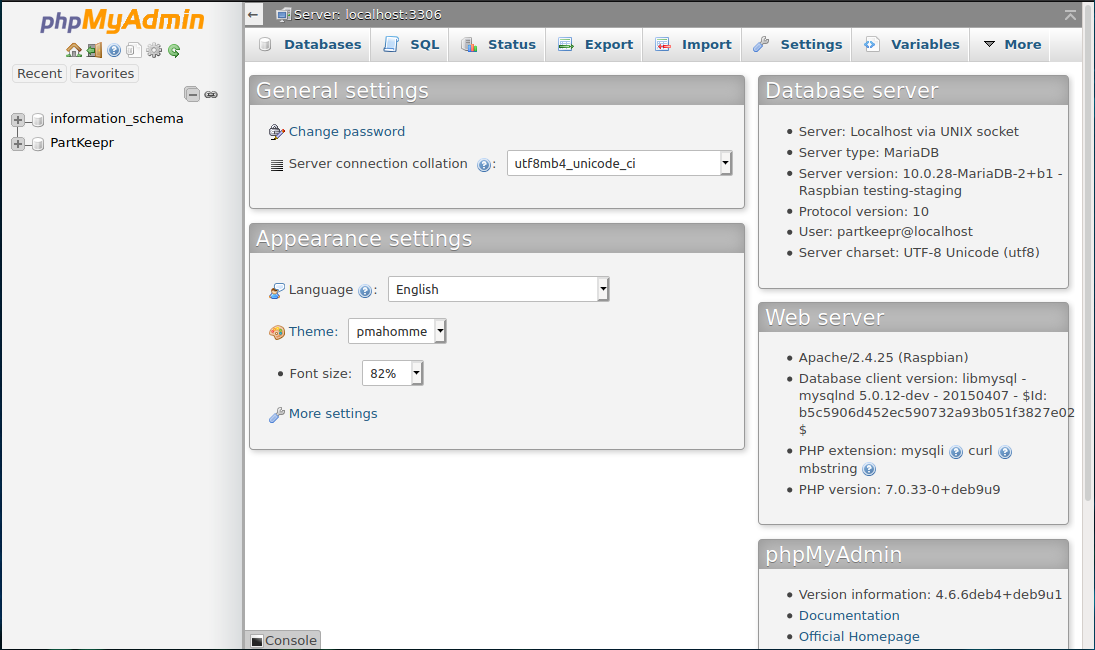
(Optional) Install phpmyadmin
If you plan to administer/manage the database, you may wish to install phpmyadmin as follows:
sudo apt-get install phpmyadmin
When prompted during the set-up wizard:
- Web server: apache2
- Configure database with dbconfig-common?: Yes
- MySQL application password for phpmyadmin: leave blank (it will be randomly generated)
Access from: http://YOUR-RPI-IP/phpmyadmin/
Create a backup SD card image
Now that’s all done, it’s a good idea to create a backup image file of the fresh installation. This may be useful in future if you need to restore a broken system. I.e. you could create a new SD card and apply your latest database and file backups to get back up and running.
Shutdown the Raspberry Pi:
sudo shutdown -h 0
Remove the SD card, put it in an SD card reader attached to a Linux machine and run the following.
Note: This assumes the SD card is at /dev/sdb. Be very careful as this can cause data corruption or loss on your computer if incorrect!
sudo dd if=/dev/sdb of=partkeepr_rpi3_fresh-install.img bs=1M status=progress
Once completed, ZIP the image file and keep it safe with your backups:
sudo zip -9 -j partkeepr_rpi3_fresh-install.img.zip partkeepr_rpi3_fresh-install.img
